How to Install a Basin Mixer Tap
Learning how to install a basin mixer tap is genuinely one of the more manageable DIY jobs in the bathroom provided you've got the right fittings, a clear process, and a bit of patience. Unlike separate hot and cold taps, a mixer combines both into a single handle and spout, and swapping one in usually takes under an hour once the water is off and the old tap is out.
This guide is for homeowners and renovators comfortable tackling a straightforward tap replacement themselves, but who want a clear, safe reference rather than guesswork. We'll cover the tools and parts you need, how to check your basin is compatible, the full step-by-step install, how to fix common problems like leaks or reversed hot/cold water, and — importantly when the job actually needs a licensed plumber rather than a Saturday afternoon and a spanner. A quick safety note up front: while replacing a like-for-like mixer tap is generally fine as a DIY job, any work that alters existing plumbing lines may need a licensed plumber depending on your state's regulations.
What Is a Basin Mixer Tap?
A basin mixer tap combines hot and cold water control into a single fitting, usually operated with one lever or handle rather than two separate taps. Instead of adjusting hot and cold flow independently, you control both temperature and flow rate through the one spout turn the handle up for more pressure, side to side for temperature. They're the standard choice in most modern Australian bathrooms, used on vanity basins, freestanding basins, and increasingly in laundries and kitchens as well.
Benefits of Installing a Basin Mixer Tap
- A cleaner, more modern look than traditional two-tap setups
- Easier temperature control with one motion instead of juggling two handles
- Simple one-handed operation, useful for busy mornings or when your hands are full
- Compatible with most single-hole basins, including many older three-hole basins with the right cover plate
- Available in a huge range of finishes chrome, matte black, brushed brass, and more so it's an easy way to refresh a bathroom's look without a full renovation

What You Need Before Installing a Basin Mixer Tap
Getting everything laid out before you start saves you climbing in and out from under the basin hunting for a missing tool.
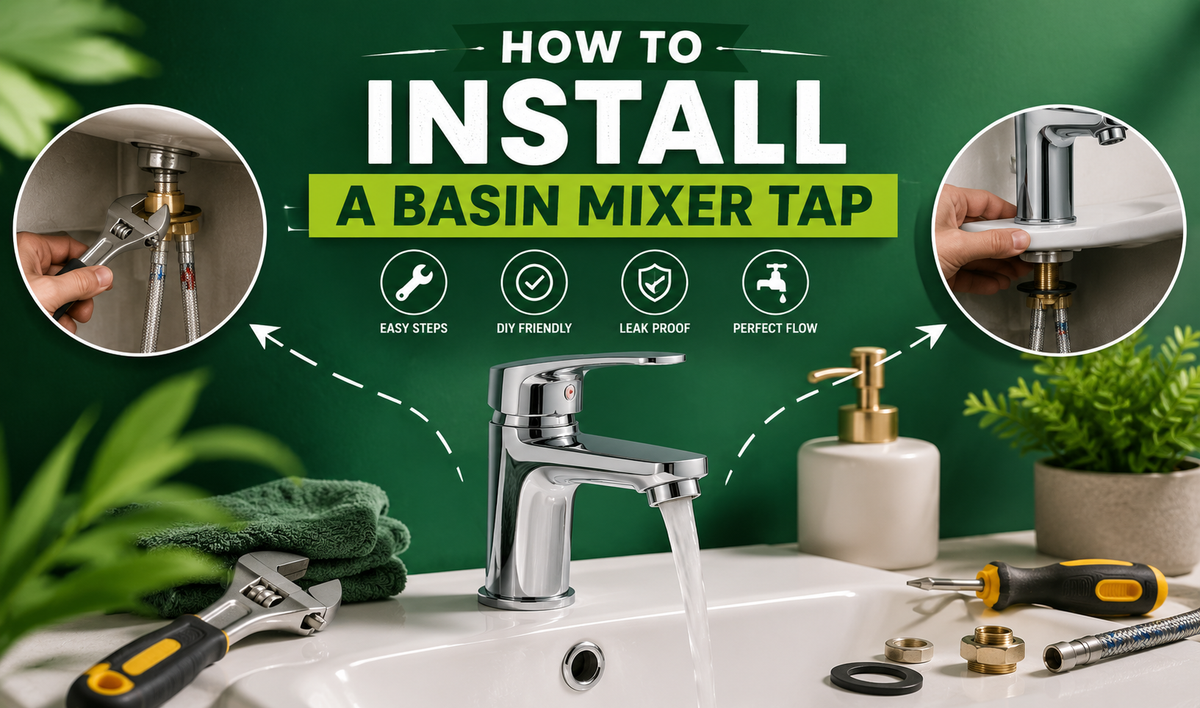
Tools You May Need
- Adjustable wrench
- Basin wrench (essential for tight spaces under the basin)
- Screwdriver
- Bucket
- Cloth or towel
- Pliers
- Measuring tape
Materials and Parts
- Your new basin mixer tap
- Flexible water supply hoses
- Mounting hardware
- Rubber seals
- Washers
- O-rings
- Any connectors specific to your plumbing setup
Most quality mixer taps come with the hoses, washers, and mounting hardware included — check the box before you start rather than assuming you'll need to source extras separately.
Check Your Basin Before Installation
This step prevents most of the installation headaches people run into. Before you buy or start fitting anything, confirm:
- Tap-hole size — most basins use a standard hole, but it's worth measuring rather than assuming
- Number of tap holes — a single-hole basin needs a standard mixer; a three-hole basin will need either a cover plate or a mixer designed for wider spacing
- Tap compatibility — not every mixer suits every basin shape, particularly with under-mount or top-mount basins
- Space underneath the basin — tight vanity cabinets can make tightening nuts genuinely difficult without a basin wrench
- Existing plumbing connections — check what fittings are already there and whether your new tap's hoses will connect directly or need an adaptor
- Hot and cold water supply positions — confirming these now avoids a reversed-connection headache later

Check the Manufacturer's Instructions
Every mixer tap is a little different some use a threaded bar and hexagonal nut, others use a quick-fit barrel nut system. Always check your specific product's instructions before starting, since the general steps below cover the common process but your exact fittings may vary slightly.
How to Install a Basin Mixer Tap Step by Step
Step 1: Turn Off the Water Supply
Locate the isolation valves under the basin and turn off both hot and cold. If your setup doesn't have individual isolation valves common in older homes you'll need to shut off the water at the mains instead. Open the existing tap afterward to release any remaining pressure in the lines, and place a bucket underneath the connections to catch residual water.
Step 2: Remove the Existing Tap
Disconnect the hot and cold supply hoses using your adjustable wrench, keeping a cloth handy for drips. Remove the retaining nut or mounting hardware underneath the basin — a basin wrench makes this far easier in tight spaces than trying to reach in with pliers. Lift the old tap away from above, then give the basin surface a proper clean before fitting the new one; old sealant and mineral buildup can stop the new tap sitting flush.
Step 3: Prepare the New Basin Mixer Tap
Before installing, check all the supplied components against the manufacturer's parts list — better to notice a missing washer now than halfway through the job. Identify the seals, washers, and mounting plate, and attach the flexible hoses to the tap body according to the instructions, hand-tightening first.
Step 4: Insert the Mixer Tap Into the Basin
Feed the tap's hoses down through the basin's tap hole from above, making sure the sealing washer sits correctly between the tap base and the basin surface. Check the tap is facing the right direction it sounds obvious, but it's an easy thing to get wrong once you're focused on threading hoses through a small hole.
Step 5: Secure the Tap From Underneath
Working underneath the basin, fit the washer and mounting hardware, then tighten the fixing nut while keeping the tap aligned and straight from above. Avoid overtightening it's tempting to really crank it down for peace of mind, but overtightening can crack the basin, distort the rubber seal, or strip the tap's threads, all of which cause the exact leak you were trying to prevent.
Step 6: Connect the Water Supply Hoses
Connect the hot and cold hoses to the correct supply lines double-check which side is which before tightening, since getting this wrong means hot water coming out when you expect cold. Make sure every connection is properly secure, and avoid twisting or sharply bending the flexible hoses, which can weaken them over time.
Step 7: Turn the Water Supply Back On
Open the isolation valves slowly rather than all at once a sudden rush of pressure into new connections is more likely to reveal a weak joint. Check every connection point for leaks as the water comes back on, then run the mixer tap and check both hot and cold water are working properly.
Step 8: Check for Leaks
Dry all the connections first with a cloth a small leak is much easier to spot on a dry surface than a wet one. Check the tap base, the flexible hoses, every connection point, and underneath the basin generally. Let the tap run for a minute or two and recheck, since some slow leaks only show up once water's been flowing for a while.
How to Connect Hot and Cold Water to a Basin Mixer Tap
Getting hot and cold connected correctly matters both for comfort and safety nobody wants a cold-water tap delivering hot water unexpectedly. Most mixer taps have their hot and cold connections clearly marked, usually with a red marker or "H" for hot and blue or "C" for cold. Match these to your isolation valves, connect the flexible hoses, and hand-tighten before giving them a final turn with a wrench.
What Happens If Hot and Cold Connections Are Reversed?
If you turn the handle to what should be the cold side and hot water comes out (or vice versa), the hoses have been connected to the wrong supply lines. The fix is straightforward: turn the water off again, disconnect the two hoses at the isolation valves, and swap them over. It's a common enough mistake that it's worth double-checking before you turn the water back on the first time, rather than discovering it mid-shower prep.

How to Seal a Basin Mixer Tap Properly
The rubber seals, O-rings, and washers supplied with your tap are designed to create a watertight fit without any additional sealant in most cases follow the manufacturer's instructions on positioning rather than assuming more sealant means a better seal. Thread sealant (like PTFE tape) can be appropriate on certain threaded connections, but check your specific tap's instructions first, since using it where it's not needed can sometimes interfere with the intended seal rather than improve it.
Common Basin Mixer Tap Installation Problems
The Tap Is Loose
Usually caused by a mounting nut that isn't tight enough, a washer sitting incorrectly, or genuinely poor access underneath the basin making it hard to tighten properly in the first place. A basin wrench solves the access problem in most cases.
The Tap Is Leaking
Common causes include a damaged seal, a connection that isn't fully tight, a washer installed incorrectly, or a cross-threaded fitting from rushing the initial connection. Working through each connection point systematically rather than guessing is the fastest way to isolate the source.
Water Flow Is Weak
Often it's a blocked aerator rather than a plumbing problem at all unscrew and clean it first. Beyond that, check for a kinked flexible hose, debris in the line, or a broader water pressure issue with the supply itself.
Hot and Cold Water Are Reversed
As covered above this means the supply hoses are connected to the wrong isolation valves and need to be swapped.
How to Maintain Your Basin Mixer Tap
- Clean the tap regularly with a soft cloth and mild soap
- Remove mineral deposits from the aerator every few months, particularly in hard-water areas
- Check underneath the basin periodically for slow leaks that might not be obvious from above
- Avoid harsh or abrasive cleaning products, which can dull the finish over time
- Inspect the flexible hoses occasionally for wear, especially in older installations
When Should You Call a Professional Plumber?
A straightforward like-for-like mixer tap replacement is generally a manageable DIY job. Call a licensed plumber instead if:
- Existing plumbing needs to be modified rather than a simple swap
- Any connections or pipework are damaged
- You've got a persistent leak you can't isolate or fix
- The isolation valves themselves aren't working
- The basin or surrounding plumbing shows signs of damage
- The job extends beyond a straightforward tap replacement into broader plumbing work
- Your state's regulations require licensed work for the specific job at hand — this varies across Australia, so check local requirements if you're unsure
Basin Mixer Tap Installation: Quick Checklist
☐ Turn off water
☐ Remove existing tap
☐ Clean basin surface
☐ Check seals and washers
☐ Insert new mixer tap
☐ Secure mounting hardware
☐ Connect hot and cold hoses
☐ Turn water on slowly
☐ Check for leaks
☐ Test water flow and temperature
Frequently Asked Questions
Can I install a basin mixer tap myself?
Yes, a straightforward like-for-like replacement is a manageable DIY job for most people. Work that alters existing plumbing lines may require a licensed plumber depending on your state.
What tools do I need to install a basin mixer tap?
An adjustable wrench, a basin wrench, a screwdriver, pliers, a bucket, and a cloth or towel cover most installations.
How long does it take to install a basin mixer tap?
Most straightforward replacements take under an hour once the water is off and you have all your tools and parts ready.
How do I remove an old basin mixer tap?
Turn off the water, disconnect the hot and cold hoses, remove the retaining nut underneath the basin, and lift the tap out from above.
Which side is hot and cold on a basin mixer tap?
Most taps mark hot with red or "H" and cold with blue or "C" match these to the correct isolation valves when connecting.
Why is my new basin mixer tap leaking?
Common causes are a damaged seal, a loose connection, an incorrectly positioned washer, or a cross-threaded fitting check each connection point systematically.
Do I need a plumber to install a basin mixer tap?
Not usually for a simple swap, but any work involving plumbing modifications or that doesn't comply with your state's DIY regulations should go to a licensed plumber.
Can a mixer tap be installed on any basin?
Most single-hole basins are compatible, but always check your basin's tap-hole size and count before buying.
How do I stop a basin mixer tap from moving?
Tighten the mounting nut underneath the basin, using a basin wrench if access is tight a loose nut is the most common cause of a wobbly tap.
Why is my basin mixer tap water pressure low?
Check the aerator for blockages first, then inspect the flexible hoses for kinks and confirm there isn't a broader supply pressure issue.